How to make oven-baked chicken crispy?
Prepping Your Chicken: The First Step to a Crispy Masterpiece
The journey to crispy oven-baked chicken begins with the very first step, preparing your chicken. And reader, believe me, this is not as simple as it may sound, oh no, one does not simply toss a chicken into the oven and expect it to emerge in all its crispy glory! It’s like throwing a party and hoping people will magically show up. Spoiler alert: it's not gonna happen. You have to send out the invites first. It's the same deal with chicken. To ensure our oven-baked chicken turns out crispy, we first need to put in some prep work.
First up is selecting the chicken. Fresh is good, but frozen is also fine - as long as you remember to properly thaw it. Never, ever attempt to bake a frozen chicken. Water is baked chicken’s natural enemy, because where there is water, there can be no crispiness, and we are all about crispiness here. Thoroughly pat your chicken down with a kitchen towel to absorb as much moisture as possible. Remember the golden rule in making oven-baked chicken: Drier is crispier.
I know what you're thinking: "Hayley, it's just chicken. It can't be that complicated." Oh, but it can be, dear reader. Like a beautiful canvas waiting to be painted, our chicken is waiting to be seasoned. And don't even think about skipping this step. A well-seasoned chicken is equal to a solar eclipse - rare, but unforgettable. Now I'm not suggesting you need a multitude of seasonings - sometimes keeping it simple with salt, pepper, and olive oil does the trick.
Making the Best Chicken Marinade: Creating the Flavor Profile
I absolutely believe in the power of a good marinade. It's like the cosmetic surgery of the culinary world - enhancing the natural beauty of the food. Or think of it as the kick you need to get through the day - without it, everything feels dull. Marinade the chicken overnight if you could, but at least for 2 hours. Longer marination results in deeper flavors and also helps to tenderize the meat. Let this be our little secret to mouthwatering flavor!
A typical marinade contains salt, sugar, acid (like vinegar or lemon juice), and oil. The sugar results in caramelization which leads to...you guessed it...crispiness! The salt and acid help to break down the proteins, making the chicken tender. As for the oil, it's there to seal in all the flavors and keep the chicken moist. Now, if you want to go down the gourmet route, ingredients like herbs, spices, and fruits can really jazz up your marinade.
Setting the Perfect Oven Temperature: A Play of Heat and Timing
Just like you wouldn't walk in a snowstorm wearing a swimsuit, we don't put our precious chicken at the wrong temperature. Getting a crispy skin requires high heat but we don't want to overcook the meat inside. Now, here's where your oven skills come into play. For the ultimate crispy treat, I normally start with a high temperature of about 450°F (230°C), then after 20 minutes, I lower it to 350°F (175°C) to finish cooking the chicken without drying out the meat.
Roasting Rack vs Baking Sheet: Choosing the Right Cookware
Picture this: you're at the beach, sunbathing, when suddenly, a huge wave splashes over, soaking you head to toe. That's how your chicken feels when it's sitting in its own juices in a baking dish with nowhere for the liquid to escape. The result? Soggy, rather than crispy skin. Instead, I recommend using a roasting rack that allows the hot air to circulate under the chicken, cooking it evenly and helping all sides to crisp up splendidly.
Making Sure It's Cooked: The Art of Chicken Thermometry
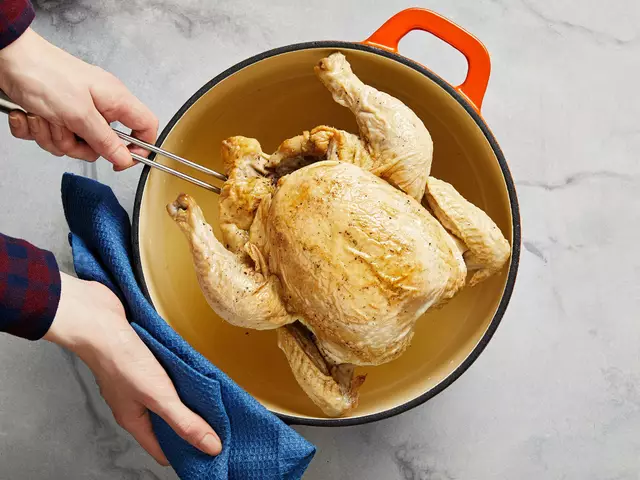
Getting the bird out of the oven too early results in undercooked meat and a lot of embarrassment in front of your guests. Leaving it in too long means you're serving bite-sized pieces of pride just burnt in the oven. Our savior? A good old meat thermometer. Insert it into the thickest part of the bird (usually the breast) without touching the bone and when it reads 165°F (75°C) - Eureka! - you've nailed it.
Resting After the War: The Importance of Patience
The moment your oven timer rings, your house fills with an aroma so delicious you could eat the air. But just like reaching the top of a mountain, the adventure isn't over yet. Letting the chicken rest for about 15 to 20 minutes will give it time to redistribute and absorb its own juices, keeping the meat succulent while the skin stays crisply in place. Rushing to carve the chicken right after taking it out of the oven would be like biting into an apple, only to find it's still core.
Carving Your Masterpiece: The Final Show
You've climbed to the mountain's peak, and now it's time to enjoy the view. Carving the chicken properly will ensure that every guest gets a good mix of crispy skin and tender meat. It's truly an art form that requires patience and understanding of the chicken's structure. Start by removing the legs and splitting them into thighs and drumsticks then proceed with separating the wings and breasts. It's a bit like conducting a symphony where the orchestra is your dinner plate.
Remember, practice makes perfect. So don’t worry if your first few attempts don’t result in the crispiest of chickens. Failure isn’t permanent, unless maybe you're a chicken. They're probably not too thrilled about that. But for us humans, it’s just a stepping stone towards perfection. So head to your kitchen, armed with your seasonings, marinade, oven mitts, thermometer, and a dash of perseverance. Soon you'll be serving oven-baked chicken so crispy, it might just crunch in your dreams too. Happy baking!